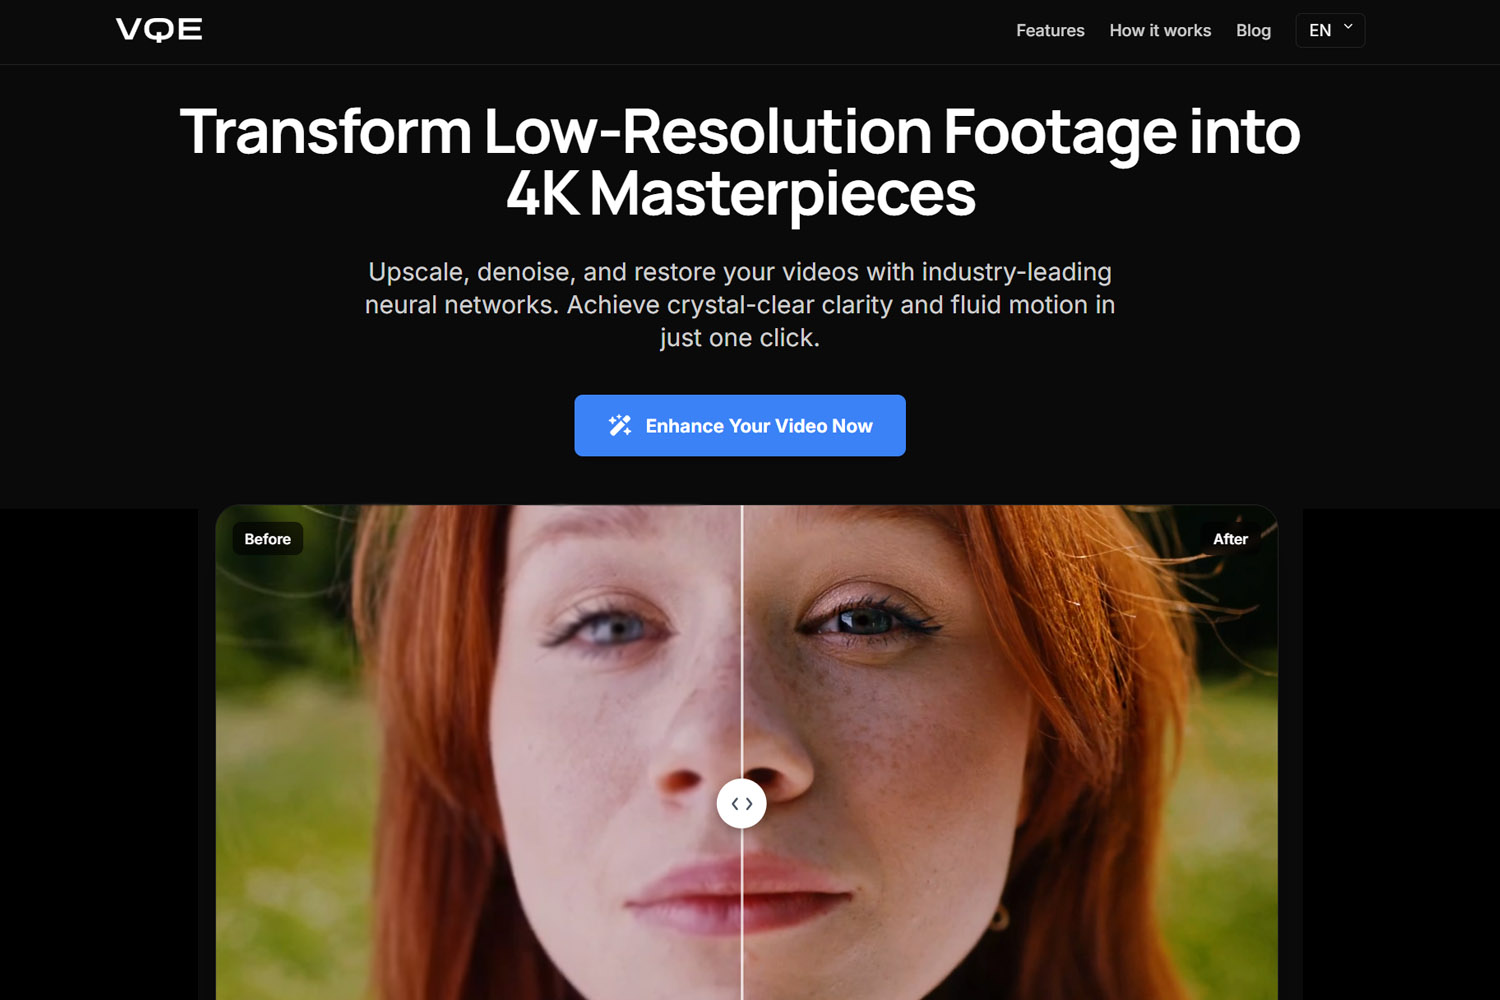
How to Fix Video Quality: 6 Methods for Blurry Clips

Fixing video quality requires identifying the root cause before choosing a solution. Blurry footage needs different treatment than pixelated compression artifacts, and low-resolution content requires different approaches than motion issues. Understanding what's wrong with your video helps you select the right fix method and avoid wasting time on solutions that won't work.
This comprehensive guide covers six proven methods for fixing video quality problems, from export settings that prevent quality loss to AI reconstruction that recovers lost detail. We'll explain not just what to do, but why each method works and when to use it.
Introduction: Why is Your Video Quality Bad?
Before fixing video quality, you need to identify what's actually wrong. Different problems require different solutions, and using the wrong fix can make things worse or waste time on methods that won't help.
Identifying the "Root Cause": Compression, Low-Light Noise, or Bad Export Settings?
The three most common causes of poor video quality are:
- Compression Artifacts: Blocky patterns, color banding, or loss of detail from low bitrate encoding
- Low-Light Noise: Grainy, "salt and pepper" appearance from camera sensors struggling in dim conditions
- Bad Export Settings: Quality loss from incorrect bitrate, codec, or resolution settings
Each cause requires a different fix:
- Compression artifacts need higher bitrate exports or AI deblocking
- Low-light noise requires AI denoising
- Bad export settings need correction in your export workflow
Understanding the root cause helps you choose the right fix method rather than trying everything and hoping something works.
The "Fixability" Scale: What Can Be Saved and What Needs a Reshoot
Not all video quality problems can be fixed. Understanding the fixability scale helps you set realistic expectations and decide when enhancement is worth attempting versus when reshooting makes more sense. For a detailed breakdown of what can be improved in video quality, see our guide.
Highly Fixable:
- Compression artifacts from low bitrate
- Noise from low-light conditions
- Slight blur from soft focus
- Color issues or flat footage
- Resolution upscaling (720p to 4K)
Moderately Fixable:
- Moderate motion blur
- Heavy compression with some detail remaining
- Interlaced video (VHS, old tapes)
- Frame rate issues (choppy playback)
Difficult or Impossible to Fix:
- Severe out-of-focus footage (lens wasn't focused)
- Extreme motion blur (fast-moving objects)
- Very low resolution (below 480p)
- Corrupted files with missing data
- Extreme compression that destroyed all detail
The threshold depends on source quality. A well-lit 720p video with minimal compression can be enhanced dramatically, while a dark, heavily compressed 240p video will produce disappointing results no matter which method you use.
Method 1: Fixing the "Upload Quality" Loss (For Content Creators)
Content creators often lose quality during the upload process, even when their source footage is good. Understanding platform-specific requirements and codec triggers helps you preserve quality through upload and processing.
The YouTube Secret: Forcing VP9 Codec with 4K Uploads
YouTube gives better processing (the VP9 codec) to 4K uploads, even if your original footage is 1080p. This is a major insight that most guides miss—you can force YouTube to use the better codec by exporting in 4K, which triggers higher-quality processing.
How It Works: When you upload 4K content, YouTube uses the VP9 codec, which provides better quality at lower bitrates than the H.264 codec used for 1080p uploads. Even if your source is 1080p, upscaling to 4K before upload triggers VP9 processing, resulting in better quality for viewers watching at any resolution.
The Process:
- Export your 1080p footage at 4K resolution
- Upload the 4K version to YouTube
- YouTube processes it with VP9 codec
- Viewers get better quality even when watching at 1080p
This trick works because YouTube's processing pipeline treats 4K uploads differently, giving them access to better codecs and processing algorithms. The result is higher quality for your viewers, even if they're not watching in 4K.
Tools like Video Quality Enhancer can upscale your 1080p footage to 4K before upload, ensuring you get VP9 processing and better quality on YouTube.
Bitrate Settings: The 2025 "Golden Ratios" for TikTok, Instagram, and YouTube
Each platform has optimal bitrate settings that preserve quality while meeting upload requirements. Using the right bitrate prevents quality loss during platform processing.
YouTube:
- 1080p: 8-12 Mbps (upload higher, YouTube will re-encode)
- 4K: 35-50 Mbps (triggers VP9 codec)
- Key Insight: Upload at higher bitrate than minimum to give YouTube's re-encoding good source material
TikTok:
- 1080p: 5-8 Mbps (platform compresses heavily)
- Key Insight: Export at exact resolution TikTok expects (1080p) with slightly higher bitrate
Instagram:
- 1080p: 3.5-5 Mbps (strict limits, heavy compression)
- Key Insight: Match Instagram's expected resolution and use their recommended bitrate range
The Golden Ratio Principle: Upload at 1.5-2x the platform's minimum bitrate to give their compression algorithms good source material. This ensures the compressed version still looks good, even after platform processing.
H.265 vs. H.264: Which One to Use for the Smallest File with the Highest Detail
H.265 (HEVC) is more efficient than H.264, creating smaller files at the same quality, but it requires more processing power and isn't supported everywhere.
H.264 Advantages:
- Universal compatibility (works everywhere)
- Faster encoding
- Lower processing requirements
- Safe choice for general use
H.265 Advantages:
- 50% smaller files at same quality
- Better quality at same file size
- More efficient compression
- Future-proof format
When to Use Each:
- H.264: For maximum compatibility (YouTube, social media, general distribution)
- H.265: For archival, local storage, or when you control the playback environment
The Trade-Off: H.265 offers better efficiency but requires more processing power and isn't universally supported. For content creators uploading to platforms, H.264 is still the safer choice because it works everywhere and platforms will re-encode anyway.
Method 2: AI Reconstruction (Fixing Blurry & Pixelated Footage)
AI reconstruction uses neural networks to recover or create detail that's missing from your source footage. This method works best when your source material has enough information for the AI to make accurate predictions. Understanding when video enhancers work helps you determine if AI reconstruction is the right approach for your footage.
Super-Resolution: Upscaling Old SD/720p Footage to 4K Without the "Blur"
AI super-resolution can upscale old SD or 720p footage to 4K without the blurry appearance of traditional upscaling. Unlike traditional methods that stretch pixels, AI analyzes patterns and textures to create new detail that fits the content type.
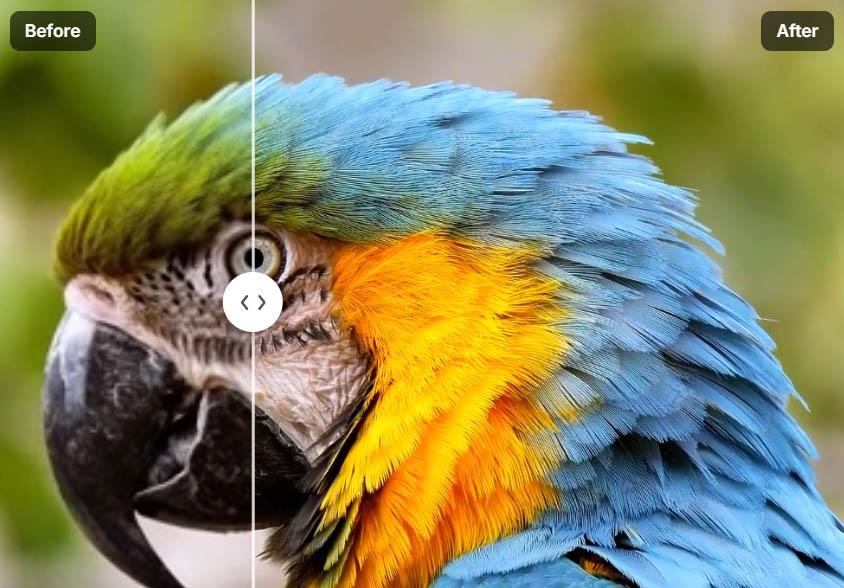
How It Works: AI upscaling uses neural networks trained on millions of video frames to predict what higher-resolution footage would look like. The AI recognizes patterns (faces, textures, objects) and generates detail based on training data, creating results that look natural rather than artificially sharpened.
Best Practices:
- Start with highest quality source available
- Use multi-step approach (denoise first, then upscale)
- Don't exceed 2x-4x upscaling factors
- Use specialized models for specific content (faces, landscapes, etc.)
Tools like Video Quality Enhancer use advanced AI models for super-resolution, producing professional-quality upscaling without requiring powerful local hardware.
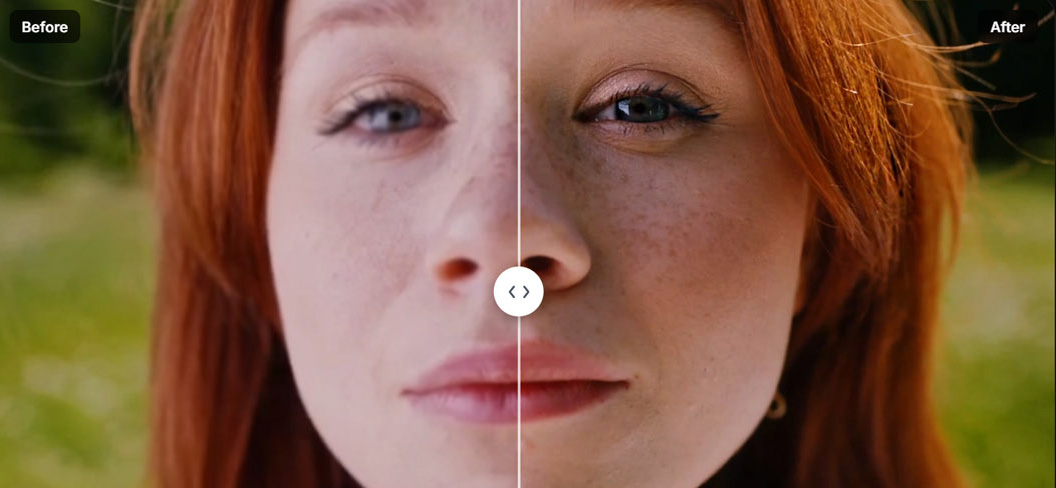
Face Recovery: Rebuilding Facial Features in Grainy Interview Clips
Face recovery uses specialized AI models trained on human anatomy to enhance facial features in low-quality footage. This is crucial for interview clips, portraits, or any footage where people are the focus.
Why It Matters: General upscalers treat faces like any other texture, often creating a "waxy" or unnatural appearance. Face recovery models understand facial structure, skin texture, and features, allowing them to enhance faces while maintaining natural appearance. For apps with face restoration, see our mobile guide.

The Process:
- AI identifies faces in the video
- Specialized models enhance facial features
- Temporal consistency maintains stability across frames
- Natural appearance is preserved
Tools with Strong Face Recovery:
- Video Quality Enhancer (advanced face refinement models)
- Remini (specialized face restoration)
- Topaz Video AI (Iris model)
Best For: Interview footage, portraits, family videos, any content where faces are important.
AI Denoising: Cleaning up "Salt and Pepper" Noise from Night-Time Videos

AI denoising removes noise while preserving detail, creating a difficult balance that traditional denoising methods fail to achieve. The AI distinguishes between noise (random, frame-to-frame variations) and real detail (consistent across frames).
How It Works: By analyzing multiple frames together, the AI identifies what's noise and removes it selectively, keeping textures, edges, and important details intact. This temporal analysis is crucial—single-frame denoising would blur everything, but multi-frame analysis allows selective noise removal.
Why It's Better: Traditional denoising blurs everything, removing noise but also losing fine details. AI denoising is smarter: it learns to distinguish between noise and detail, removing one while preserving the other.
Best Practices:
- Use temporal analysis (multi-frame processing)
- Don't over-denoise (can create "plastic" look)
- Process before upscaling (cleaner source = better upscale)
- Use specialized models for different noise types
Method 3: Manual "Post-Production" Fixes (No AI Needed)
Manual techniques give you precise control over every aspect of your footage. While AI tools can automate some processes, understanding manual methods helps you make better decisions about when to use automation and when to do things by hand.
The Sharpening Mask: How to Sharpen Subjects Without Making the Background Noisy
Selective sharpening applies sharpening only to important areas like faces or text, leaving backgrounds soft. This keeps the cinematic look while making key elements pop.
How It Works:
- Create a mask around your subject (face, text, important objects)
- Apply sharpening only to the masked area
- Leave background unsharpened or apply light sharpening
Why It Works: Sharpening everything equally creates noise in backgrounds and can make footage look over-processed. Selective sharpening enhances what matters without introducing artifacts in less important areas.
Professional Alternative: High-Pass Filtering A "Sharpness" slider above 20% usually creates "halos" around people. High-pass filtering is a professional alternative that enhances edges more naturally without creating halos or artifacts.
The High-Pass Method:
- Duplicate your video layer
- Apply high-pass filter
- Set blend mode to overlay or soft light
- Adjust opacity to control intensity
This method creates more natural sharpening without the halos that standard sharpening sliders produce.
Luma/Color Balancing: Fixing "Gray" or "Flat" Footage to Add Perceived Depth

Color correction and grading can make footage appear higher quality by improving contrast and color relationships. This works because our brains interpret contrast and color relationships as indicators of quality.
The Depth Effect: By carefully adjusting shadows, midtones, and highlights separately, you can create a three-dimensional feel that makes flat footage appear more detailed. This works because contrast and color separation create visual depth that our brains interpret as quality.
The Process:
- Adjust shadows, midtones, and highlights separately
- Enhance contrast between different areas
- Improve color saturation and relationships
- Create visual separation that guides the viewer's eye
Why It Works: Professional colorists use this technique to make footage look more expensive. The depth effect comes from contrast and color separation, not just resolution or sharpness.
Stabilization: Fixing Shaky Handheld Footage (and the "Crop" Trade-Off)

Digital stabilization works by cropping and zooming the frame to compensate for movement, which introduces a quality trade-off. Understanding this helps you decide when stabilization is worth the quality cost.
How It Works: Stabilization software analyzes camera movement and crops/zooms the frame to keep the subject centered. This creates smoother footage but reduces resolution because parts of the frame are cropped away.
The Trade-Off:
- Benefit: Smoother, more professional-looking footage
- Cost: Lower resolution due to cropping
- Solution: AI-powered stabilization can minimize crop by using intelligent analysis
Best Practices:
- Use stabilization sparingly (only when necessary)
- Accept minor shake if stabilization would crop too much
- Use AI stabilization when available (minimizes crop)
- Consider reshooting if shake is too severe
Unless done with high-end AI stabilization, this cropping reduces quality by removing pixels from the edges. Understanding this trade-off helps you decide when stabilization improves quality versus when it makes things worse.
Method 4: Fixing Motion & Playback Issues
Motion and playback problems require different fixes than quality issues. Understanding frame rates, interpolation, and deinterlacing helps you fix choppy or problematic playback.
Frame Interpolation: Fixing "Choppy" Video by Adding AI-Generated Frames
Frame interpolation creates new frames between existing ones, converting low frame rate footage to higher frame rates for smoother playback. This works by analyzing motion between frames and predicting what intermediate frames should look like.
How It Works: The AI understands how objects move, so it can create realistic in-between frames. This technique is particularly effective for simple, predictable motion like a person walking, a car driving, or a camera panning.
Best Practices:
- Works best with simple, predictable motion
- Less effective for complex scenes with many overlapping objects
- Can create artifacts with fast motion blur
- Use for converting 24fps to 60fps for smoother playback
The Result: Smooth 60fps footage from 24fps or 30fps source material, creating that "butter-smooth" playback effect that makes footage feel more professional.
Deinterlacing: The "Zebra Stripe" Fix for Old Family VHS Tapes
VHS and other analog formats use interlaced scanning, where each frame is split into two fields. Modern displays expect progressive video, so interlaced footage needs deinterlacing before enhancement, or you'll get "zebra stripes" in your render.
How It Works: Deinterlacing converts interlaced video (where each frame has two fields) to progressive video (where each frame is complete). Without proper deinterlacing, you'll see horizontal lines or "zebra stripes" in your enhanced video.
Tools with Proper Deinterlacing:
- Video Quality Enhancer (advanced deinterlacing for analog formats)
- Topaz Video AI (Dione models)
- FFmpeg with Yadif filter
The Process:
- Identify if your video is interlaced
- Apply deinterlacing algorithm (Dione, Yadif, etc.)
- Then proceed with other enhancement steps
This is essential for old family tapes—without proper deinterlacing, any enhancement will produce artifacts.
Method 5: Repairing Corrupted or Unplayable Files
Sometimes video quality problems are actually file corruption or compatibility issues. Understanding how to repair corrupted files or convert incompatible formats can recover footage that seems lost.
Header Repair: How to Fix a Video File That Won't Open (MP4/MOV)
Corrupted video files often have damaged headers that prevent playback, even though the video data itself might be intact. Header repair tools can rebuild the file structure, making the video playable again.
Common Causes:
- Incomplete downloads or transfers
- System crashes during recording
- Storage device errors
- Interrupted encoding processes
The Solution: Header repair tools analyze the video data and rebuild the file structure. This can recover footage that appears completely broken, though severe corruption may result in some data loss.
Tools for Header Repair:
- VLC Media Player (built-in repair)
- FFmpeg (command-line repair)
- Specialized repair software
Best Practices:
- Always backup original files before attempting repair
- Try multiple repair tools if one doesn't work
- Some corruption may be permanent
Codec Conversion: Using Handbrake to Fix "Jerky" Playback Caused by Incompatible Formats
Incompatible codecs can cause jerky playback or complete failure to play, even when the video file itself is fine. Converting to a compatible codec fixes playback issues.
How It Works: Handbrake and similar tools can convert video from one codec to another, ensuring compatibility with your playback device or platform. This is particularly useful for older formats or specialized codecs that aren't widely supported.
Common Conversions:
- H.265 to H.264 (for compatibility)
- Older codecs to modern standards
- Specialized formats to universal codecs
Best Practices:
- Use lossless or high-quality settings when converting
- Maintain original resolution and frame rate
- Choose widely supported codecs (H.264 for maximum compatibility)
Hardware Bottlenecks: Proxy Editing for Slow Computers
Most guides ignore the reader's computer, but hardware limitations can prevent quality fixes from working properly. Understanding proxy editing helps you fix quality on a slow computer without it crashing.
What is Proxy Editing?
Proxy editing uses lower-resolution versions of your footage for editing, then applies your edits to the full-resolution originals during export. This allows you to work smoothly on slower hardware while maintaining final quality.
How It Works:
- Create low-resolution proxy files (720p or 1080p)
- Edit using proxies (smooth playback, fast scrubbing)
- Export using original high-resolution files
- All edits apply to full-quality originals
Benefits:
- Smooth playback on slower hardware
- Faster scrubbing and editing
- No quality loss in final export
- Works with any editing software
When to Use:
- Slow computer struggling with 4K footage
- Multiple video tracks causing lag
- Complex effects slowing down playback
- Need for responsive editing workflow
This approach lets you fix quality issues even on hardware that can't handle full-resolution playback, ensuring you can apply enhancements regardless of your computer's capabilities.
The "VMAF" Benchmark: Measuring If Your Fix Actually Worked
"Fixing" quality can be measured using the VMAF (Video Multi-method Assessment Fusion) metric, which Netflix and YouTube use to assess video quality. Understanding this helps you verify that your fixes actually improved quality.
How to Check Your Results
YouTube's "Stats for Nerds" shows technical information about video playback, including codec, resolution, and quality metrics. After uploading your fixed video, check Stats for Nerds to see if YouTube is using better codecs or higher quality settings.
What to Look For:
- Codec used (VP9 is better than H.264)
- Resolution and frame rate
- Bitrate information
- Quality indicators
The VMAF Connection: Videos with higher VMAF scores look better to viewers, even if they're technically the same resolution. Tools that improve VMAF scores are providing objectively better quality, not just a different look.
Why It Matters: Quality improvement isn't subjective—it's measurable. When your fixes improve VMAF scores or trigger better codec processing, you're getting objectively better quality that viewers will notice.
Non-Generic Pro Tips
"Film Grain" as a Mask: The Counter-Intuitive Quality Trick
If your video looks "plastic" after using AI to fix it, add a 2% layer of digital film grain. This counter-intuitive tip tricks the human eye into seeing more detail than is actually there.
How It Works: Film grain provides texture that masks compression artifacts and AI-generated smoothness. The grain gives the eye something to focus on besides the "plastic" appearance, making the video feel more natural and detailed.
Best Practices:
- Use subtle grain (1-3% opacity)
- Match grain to your content type
- Don't overdo it (too much grain looks artificial)
- Apply after all other enhancements
This technique is particularly useful for footage that will be heavily compressed, like content for social media platforms.
Audio's Role in Visual Perception: The Psychological "Fix"
Fixing the audio (removing hiss, improving clarity) makes the viewer perceive the video as higher quality. This is a psychological effect where good audio elevates the entire production's perceived quality.
How It Works: Our brains process audio and video together. When one element is high quality, we assume the other is too. Poor audio makes everything feel amateur, while good audio elevates the entire production.
The Fix:
- Remove background noise and hiss
- Improve audio clarity and balance
- Ensure consistent audio levels
- Use professional audio processing tools
This psychological connection means audio fixes can improve perceived video quality even when you haven't changed the video itself.
The "Oversharpening" Warning: Avoiding Halos
A "Sharpness" slider above 20% usually creates "halos" around people, which looks unnatural and reduces perceived quality. Understanding this helps you avoid over-sharpening that makes footage look worse.
The Problem: Excessive sharpening increases contrast along edges, creating white or dark lines around objects. These halos are immediately noticeable and make footage look over-processed, reducing the professional appearance you're trying to achieve.
The Solution: High-Pass Filtering High-pass filtering is a professional alternative that enhances edges more naturally without creating halos or artifacts. This method provides sharpening without the negative side effects of standard sharpening sliders.
Best Practices:
- Keep sharpening below 20% if using standard sliders
- Use high-pass filtering for professional results
- Apply sharpening selectively (masks for important areas)
- Test on a small section before applying to entire video
Summary Checklist: The "3-Minute Quality Audit"
Use this quick checklist to identify what's wrong with your video and which fix method to use.
Step 1: Identify the Problem (30 seconds)
- Compression artifacts (blocky, color banding)
- Low-light noise (grainy, "salt and pepper")
- Blurry or out of focus
- Low resolution
- Motion issues (choppy, shaky)
- Color problems (flat, gray, washed out)
Step 2: Check Export Settings (1 minute)
- Bitrate appropriate for resolution and platform
- Codec compatible with target platform
- Resolution matches or exceeds target
- Frame rate appropriate for content
Step 3: Assess Fixability (1 minute)
- Source quality sufficient for enhancement
- Enough detail for AI to work with
- Not too corrupted or damaged
- Worth fixing versus reshooting
Step 4: Choose Fix Method (30 seconds)
- Export settings fix (Method 1)
- AI reconstruction (Method 2)
- Manual post-production (Method 3)
- Motion/playback fixes (Method 4)
- File repair (Method 5)
This 3-minute audit helps you quickly identify problems and choose the right fix method, saving time and ensuring you address the actual issues rather than guessing.
Conclusion: Fixing Video Quality Requires the Right Method
Fixing video quality isn't about trying every tool—it's about identifying the problem and choosing the right fix method. Different issues require different solutions, and understanding what's actually wrong helps you fix it efficiently.
Export settings fixes prevent quality loss before it happens, while AI reconstruction recovers detail that seems lost. Manual techniques give you precise control, and motion fixes address playback problems. Each method has its place, and the best results come from using the right tool for the specific problem.
The key is matching the fix to the problem: compression artifacts need better export settings, blurry footage needs AI reconstruction, and motion issues need frame interpolation or deinterlacing. Tools like Video Quality Enhancer provide cloud-based AI reconstruction that can handle multiple quality issues without requiring powerful local hardware.
Understanding measurable quality metrics like VMAF helps you verify that your fixes actually worked, rather than just hoping they improved things. The future of video quality fixing lies in tools that combine multiple methods—AI reconstruction, proper export settings, and manual fine-tuning—to address quality problems comprehensively.
By following the right method for your specific problem and verifying results with measurable metrics, you can fix video quality issues effectively and achieve professional results regardless of your source material's limitations.