How to Make Blurry Videos Clearer Using AI

Blurry videos are frustrating, but modern AI tools can fix many types of blur that were impossible to correct just a few years ago. The key is understanding what kind of blur you're dealing with and choosing the right tool and approach. Not all blur is fixable, but when the source material contains enough information, AI deblurring can produce dramatic improvements.
This guide walks you through the entire process, from diagnosing your blur problem to choosing the right tool and getting professional results. We'll cover what works, what doesn't, and practical workflows that save time and produce better outcomes.
Understanding What Can Be Fixed
Before you start processing footage, it's crucial to understand what type of blur you're dealing with. Not all blur is created equal, and AI can fix some types while struggling with others. This diagnosis step saves hours of processing time and helps you set realistic expectations.
Motion Blur vs Out-of-Focus: The Critical Difference

Motion blur happens when the camera or subject moves during exposure, creating that smeared appearance you see in action shots or shaky handheld footage. This type of blur is often fixable because the camera captured the subject at multiple positions across frames. The AI can analyze these positions and reconstruct what a sharp frame would look like.
Think of motion blur like a photo where someone moved their hand while the shutter was open. The camera still captured information about where the hand was at different moments. AI can use this temporal information to reconstruct a sharper version.
Out-of-focus blur is different. This happens when the lens wasn't focused on your subject, meaning the camera never captured sharp detail in the first place. If the lens wasn't focused, there's no sharp version of that moment to recover. The AI has to guess what should be there, which often produces artifacts or unrealistic results.
AI can fix a shaky hand because motion blur contains temporal information. The camera captured the subject at different positions, allowing the AI to reconstruct sharp frames. This works particularly well when the motion is predictable and the blur isn't too severe. The AI uses this temporal consistency to maintain stability across frames, which is essential for natural-looking deblurring.
AI struggles with out-of-focus footage because the lens never captured sharp detail. The AI might try to sharpen the blur itself, but this creates halos and artifacts rather than recovering lost detail. If you can't recognize the subject in the original footage, deblurring likely won't help.
The Source Material Threshold
The quality of your source material determines how well AI deblurring will work. This is the "garbage in, garbage out" principle applied to video enhancement. The AI needs enough information to make accurate predictions about what sharp detail should look like.
Well-lit footage with minimal compression provides the best results. A slightly blurry 1080p video recorded at high bitrate will deblur much better than a heavily compressed 480p video with the same amount of blur. The AI has more information to work with in the first case, allowing it to reconstruct detail accurately.
The threshold depends on several factors: resolution, bitrate, lighting, and blur severity. Understanding where your footage sits relative to this threshold helps you decide whether deblurring is worth attempting.
Choosing the Right Tool
Different tools suit different needs. Understanding what each tool does well helps you match the right solution to your situation.
Topaz Video AI: Maximum Quality and Control

Topaz Video AI is the industry standard for professional video restoration. It offers multiple specialized models for different types of content and blur, giving you precise control over the deblurring process.
The Proteus model allows fine-tuning of enhancement parameters, letting you adjust strength, texture preservation, and other settings granularly. This works best for users with high-end GPUs who need maximum quality and don't mind longer processing times.
Topaz excels at handling complex blur scenarios because it analyzes multiple frames together for temporal consistency. Instead of processing each frame independently, it uses information from surrounding frames to maintain stability. This prevents the flickering and frame-to-frame variations that plague simpler tools.
The downside is hardware requirements. Topaz needs a powerful GPU—typically an NVIDIA RTX series or Apple Silicon—for practical processing speeds. On mid-range hardware, processing can take 24 hours or more for long videos. But if you have the hardware and need the best quality, Topaz delivers.
Aiarty: Natural Textures and Lower Hardware Requirements

Aiarty specializes in preserving natural textures, which is crucial for faces and skin. Many AI deblurrers create a "waxy skin" problem where faces look plastic, but Aiarty addresses this with texture preservation algorithms.

The tool offers a texture preservation slider that lets you control how much detail enhancement is applied. This helps you find the balance between sharpness and natural appearance. For footage with people, this is often more important than maximum sharpness.
Aiarty's step mode is particularly useful for users with older GPUs. Instead of loading entire frames into memory, it processes video in tiles. This allows 4K deblurring on systems with limited VRAM, trading some processing speed for compatibility with lower-end hardware.
If you're working with portrait footage or interviews and want to avoid the artificial look that aggressive processing can create, Aiarty is worth considering. It's more affordable than Topaz and works on hardware that Topaz struggles with.
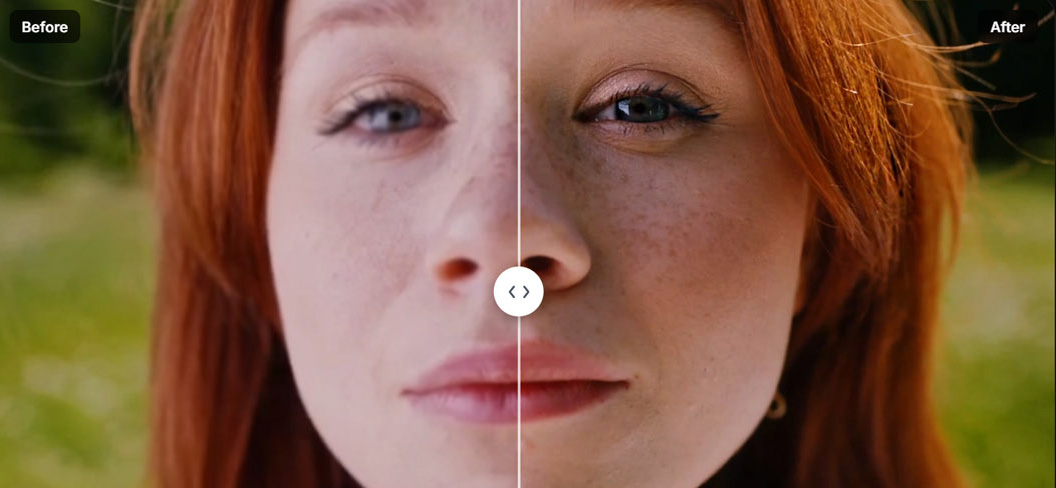
Video Quality Enhancer: Cloud Processing Without Hardware Limits
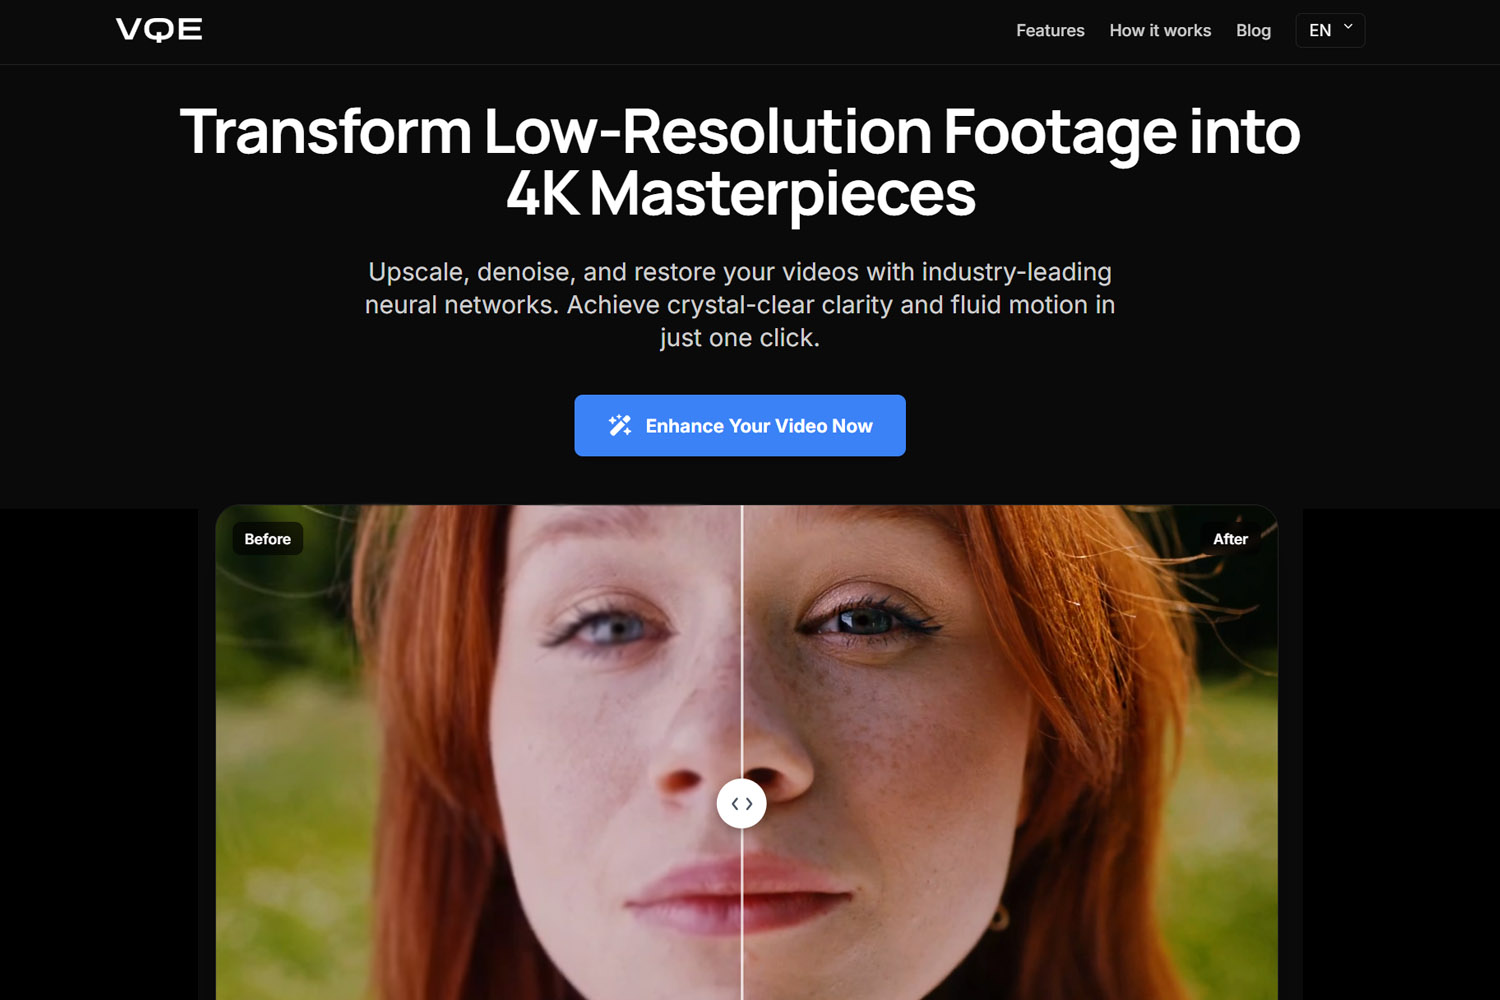
Video Quality Enhancer brings professional-grade AI deblurring to the cloud, eliminating hardware requirements entirely. You upload your blurry footage, and the tool processes it using specialized neural networks trained for video enhancement, all without needing a powerful local GPU.
This makes it ideal for users who want professional results without hardware investment. Cloud processing means you can deblur 4K footage on a basic laptop, as long as you have internet connectivity. The processing happens on remote servers with powerful GPUs, so your local hardware doesn't matter.
Video Quality Enhancer offers advanced face recovery models that stabilize eyes, skin texture, and expressions across frames. This temporal consistency is essential for natural-looking results, especially for footage with people.
The trade-off is upload time and internet dependency. Large files take time to upload, and you need a stable connection. But for occasional use or users without high-end hardware, cloud processing removes the biggest barrier to professional-quality deblurring.
Remini: Fast Mobile Fixes

Remini focuses on speed and convenience, making it ideal for quick social media clips. The processing happens quickly, though the quality is typically lower than professional desktop tools.
This works well for casual users who need quick results and don't need maximum quality. If you're fixing a blurry clip for Instagram or TikTok and need it done in minutes rather than hours, Remini fits that workflow.
The quality is good enough for social media, but it's not suitable for professional restoration work. For quick fixes on mobile devices, Remini is convenient, but for serious deblurring, you'll want a more powerful tool.
CapCut: Integrated Editing with Basic Enhancement
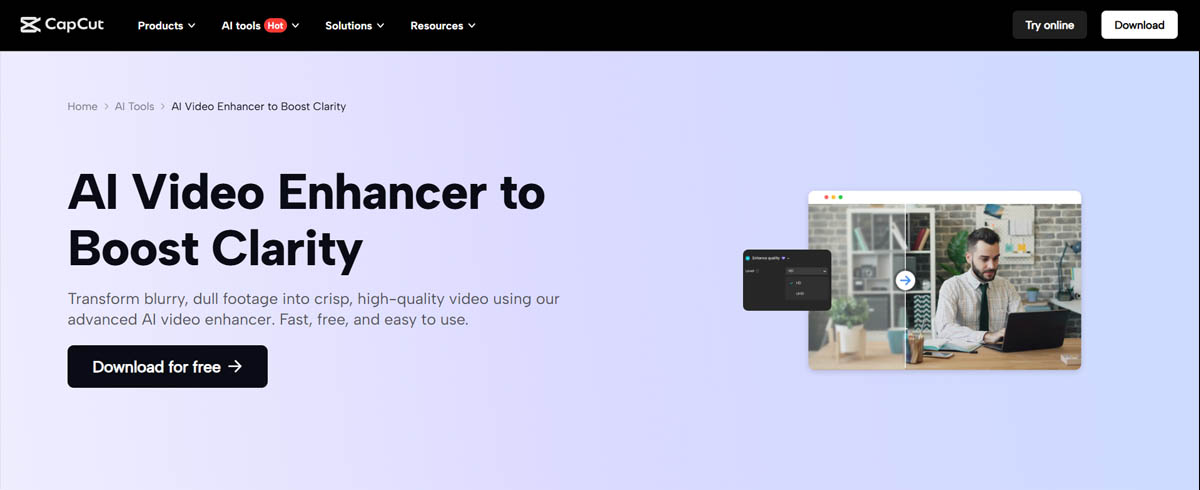
CapCut includes built-in AI enhancement features, making separate deblurring software unnecessary for basic improvements. The "Enhance Image" feature provides basic deblurring suitable for social media content.
If you're already using CapCut for editing, the integrated enhancement is convenient. It's free and easy to use, but the quality is lower than dedicated tools. This works well for creators on a budget who need quick fixes and don't need maximum quality.
The integrated approach means you can deblur and edit in the same workflow, which saves time. But if you need professional results, you'll want a dedicated deblurring tool.
DaVinci Resolve: Free Professional Option
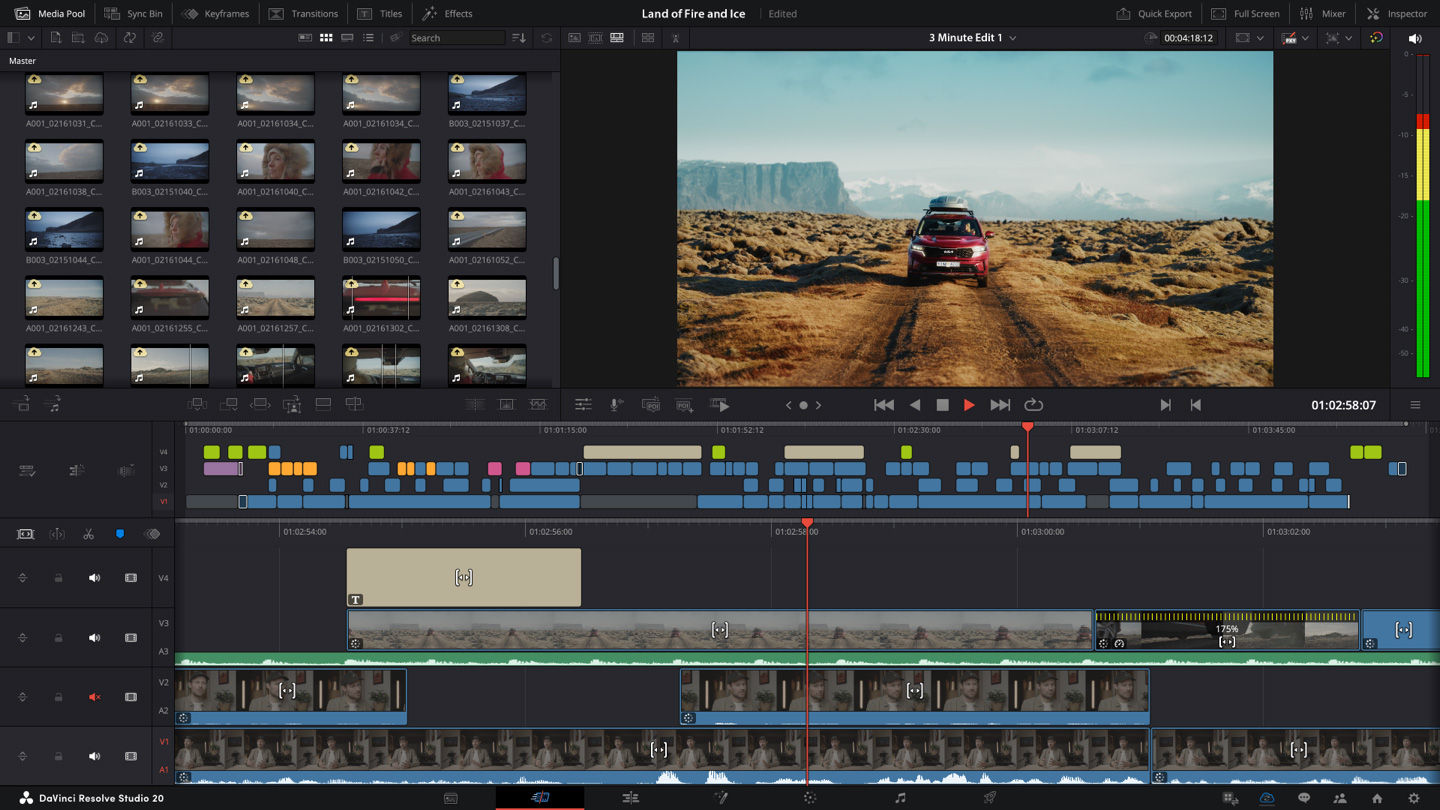
DaVinci Resolve's Super Scale feature uses AI to upscale and enhance footage, including deblurring capabilities. It's completely free and integrated with professional editing workflows, making it an excellent option for editors already using Resolve.
The quality is professional-grade, and since Resolve is free, this is one of the best value options available. The downside is that you need to learn Resolve, which has a steep learning curve. But if you're willing to invest the time, you get professional deblurring without any software costs.
The Professional Workflow
Following a structured workflow produces better results and saves time. These steps represent best practices used by professional video editors and restoration specialists.
Start with Pre-Processing
Before you even open your deblurring tool, slightly increase contrast and sharpness in a basic editor. This gives the AI clearer edges to work with, often resulting in noticeably better final results. You're not trying to fix the blur yourself—just providing the AI with better input data.
A slight contrast boost (5-10%) and minimal sharpening helps the AI make more accurate predictions. The key is subtlety. Too much pre-processing can create artifacts that the AI then tries to enhance, making things worse. But a light touch provides the AI with better information without introducing new problems.
This pre-processing step takes just a minute but can improve your results significantly. Most video editors have basic contrast and sharpness controls, so this is accessible regardless of which tool you're using.
Trim Before Processing
Upload only the specific blurry seconds to save processing time and costs. Most AI deblurring tools charge or limit based on video length, so trimming your footage to just the problematic sections reduces both time and expense.
If only 10 seconds of a 5-minute video are blurry, there's no point processing the entire file. Trim the blurry sections, process them separately, then recombine with the rest of your footage in your editor.
Pre-trimming also improves results because the AI can focus its processing power on the actual problem areas rather than spreading resources across unnecessary footage. This is especially important for cloud tools where processing time directly affects cost.
Choose the Right Model
Different AI models are optimized for different types of content and problems. Understanding these options helps you get the best outcome for your specific footage.
"Real Smooth" models work best for grainy clips with sensor noise or compression artifacts. These models focus on reducing noise while maintaining natural appearance, creating cleaner footage without the plastic look that plagues aggressive processing.

"Gen Detail" models excel at sharpening textures like hair, skin, and fine details. These models use generative approaches to create plausible detail, which works well when you need to enhance specific textures without over-processing the entire frame.
Face-specific models are essential for footage with people. These models understand human facial anatomy and can enhance faces while maintaining natural appearance. Without specialized face models, backgrounds might look sharp while faces remain blurry, creating a jarring disconnect.
Most professional tools offer multiple models, allowing you to choose based on your content type. Experimenting with different models helps you find the best match for your specific footage. Process a short test clip with different models to see which produces the best results before processing the entire video. For a detailed breakdown of what can and cannot be improved with AI enhancement, see our comprehensive guide.
Adjust Strength Carefully
The strength slider controls how aggressively the AI processes your footage. Finding the right balance is crucial because too little strength produces minimal improvement, while too much creates artifacts and unnatural appearance.
80% strength is usually a good starting point for most footage. This provides significant improvement without creating the "plastic cartoon" look that comes from over-processing. Lower strength (50-70%) works better for already-decent footage that just needs slight sharpening. Higher strength (90-100%) can work for heavily degraded footage, but often introduces artifacts that reduce overall quality.
Process a short test clip at different strength levels to find what works best for your specific footage before processing the entire video. The optimal setting varies by content type, blur severity, and the specific tool you're using.
Preview Before Final Processing
Using split-screen comparisons helps you check for AI hallucinations before committing to long processing times. The AI might generate detail that looks convincing but isn't actually in the original footage.
Look for text, faces, and fine details that might be incorrectly generated. AI deblurring can sometimes "guess" letters on signs or facial features incorrectly, creating results that look sharp but are factually wrong. This is particularly important for documentary or archival footage where accuracy matters.
The preview loop also helps you fine-tune settings. Make adjustments based on what you see in the preview, then process the final version with optimal settings. Split-screen comparison shows you exactly what changed, making it easier to spot problems and ensure the enhancement actually improves the footage rather than introducing new issues.
Advanced Techniques
Modern AI deblurring tools offer advanced features that go beyond basic sharpening. Understanding these techniques helps you get professional results that stand out from basic enhancement.
Face Refinement for Natural Results
Activating specialized face models rebuilds eyes and teeth accurately by understanding human anatomy. These models are trained specifically on facial features, allowing them to enhance faces while maintaining natural appearance.
Face refinement is crucial for footage with people because human brains focus intensely on faces. If faces look wrong, the entire video feels off, even if backgrounds are perfectly enhanced. Specialized face models prevent the "waxy skin" problem and maintain realistic facial features.
Professional tools like Topaz Video AI and Video Quality Enhancer offer advanced face recovery models that stabilize eyes, skin texture, and expressions across frames. This temporal consistency is essential for natural-looking results. The models understand that eyes should remain stable, skin should have natural texture, and expressions should stay consistent throughout the video.
HDR Remastering for Perceived Sharpness
Adding 10-bit color depth can make a blurry video feel sharper to the human eye even if the actual resolution doesn't change. This works because our brains interpret contrast and color relationships as indicators of quality.
HDR remastering enhances perceived sharpness by expanding the color range and improving contrast. The increased color depth creates a three-dimensional feel that makes footage appear more detailed and vibrant, even when the actual pixel-level sharpness is unchanged.
This technique works particularly well for footage that's slightly soft rather than heavily blurred. The color enhancement creates the perception of improved quality, which can be more effective than aggressive sharpening in some cases. It's a subtle technique, but it can make a noticeable difference in how sharp the footage appears.
Batch Processing for Multiple Clips
If you have multiple blurry clips, use batch settings to apply the same deblurring model across an entire project. This saves time and ensures consistency across all your footage.
Batch processing works best when all clips have similar problems. If some clips have motion blur while others are out of focus, you might need different settings for each. But for consistent issues across multiple clips—like a vlog where several shots have similar camera shake—batch processing streamlines your workflow significantly.
Most professional tools support batch processing, allowing you to queue multiple videos with the same settings. This is particularly useful for vloggers or content creators who need to process many clips efficiently. You set the parameters once, then let the tool process everything automatically.
Will Your Computer Handle It?
Before you start processing, it's worth checking whether your computer can handle the task. Desktop software needs powerful hardware, while cloud tools work on any computer with internet.
If you're using desktop software like Topaz Video AI and your computer crashes or processes extremely slowly, your hardware might not be powerful enough. Try processing a short test clip first—if it takes more than a few minutes for a 10-second clip, you'll likely struggle with longer videos.
Cloud solutions like Video Quality Enhancer eliminate this problem entirely. Your computer doesn't do the processing, so it doesn't matter how powerful it is. As long as you have internet, you can process 4K footage on a basic laptop. The trade-off is upload time and internet dependency, but for most users, this is easier than upgrading hardware.
Some desktop tools offer compatibility modes for older computers. Aiarty, for example, has a mode that processes video in smaller chunks, which works on hardware that would otherwise crash. The processing takes longer, but it works. If your desktop software offers this option and you're having crashes, try enabling it.
Common Problems and How to Avoid Them
AI deblurring can introduce problems if not used carefully. Understanding these issues helps you avoid them and get better results.
When the AI Gets It Wrong
Sometimes the AI creates detail that looks sharp but isn't actually correct. This happens most often with text on signs, license plates, or facial features. The AI might "guess" what letters or features should be there, and those guesses can be wrong.
Always preview your results before final processing, especially if your footage contains text or important facial details. Check signs, license plates, and faces carefully. If something looks off, the AI might have guessed incorrectly. For documentary or archival footage where accuracy matters, verify important details manually after processing. If you're using ChatGPT to analyze your footage, it can help identify these potential accuracy issues before you process the entire video.
Fixing Audio Sync After Processing
Sometimes the audio gets slightly out of sync after deblurring. This is easy to fix—just re-sync your audio in your video editor after processing.
Most video editors have automatic audio sync tools. Import your deblurred video, select both the video and audio tracks, and use the sync function. This takes seconds and prevents noticeable sync issues. It's an easy step to forget, but it's worth checking, especially for longer videos.
Making It Look Natural
Sometimes deblurred video looks too clean and artificial. If your result looks overly smooth or "painted," add a tiny bit of digital grain in your video editor.
Most editors have grain or noise filters. Apply it subtly—just enough to break up that overly smooth appearance. This makes the footage look like it was shot on a real camera rather than processed by AI. It's a small final touch, but it makes a big difference in how natural the result looks.
Final Thoughts
Fixing blurry videos with AI is possible, but success depends on understanding what type of blur you're dealing with and choosing the right tools and approach. Motion blur is often fixable, while out-of-focus footage is much harder to improve. The quality of your source material determines how well AI deblurring will work.
Professional workflows involve diagnosis, tool selection, model choice, strength adjustment, and careful previewing. Following these steps produces better results than simply applying default settings. Advanced techniques like face refinement and HDR remastering can further improve outcomes when used appropriately.
Hardware requirements matter. Desktop software needs powerful GPUs, while cloud solutions eliminate hardware barriers. Understanding these trade-offs helps you choose the right approach for your situation and budget.
The key is matching the right technique to your specific footage and problems. Not all blur is fixable, but when the source material contains enough information, modern AI deblurring can produce dramatic improvements that would have been impossible just a few years ago.
The key is matching the right technique to your specific footage and problems. Not all blur is fixable, but when the source material contains enough information, modern AI deblurring can produce dramatic improvements that would have been impossible just a few years ago.